Tag Archives: sponge cake

  • Sponge Cake with Berries and Cherries

    Sponge cake is like my favourite pair of skinny blue jeans.

    Worn with a fitted t-shirt and ballet flats, my blue jeans are my everyday wardrobe staple, suitable for the school run, cooking in, writing in and shooting in. But dressed up with a pair of heels, a sheer top and sharply tailored jacket, my blue jeans are equally appropriate attire for dinner or drinks with friends.

    sponge cake with berries

    Like my blue jeans, sponge cake is a great, everyday kind of cake; it can be whipped up without fuss using pantry and fridge staples. But dressed up with fresh berries and flowers sponge cake can also be served at a fancy afternoon tea or dinner party.

    sponge cake

    I’d never made sponge cake before I got my KitchenAid stand mixer because I’m an impatient person and the thought of mixing something with a hand mixer for ten minutes made me feel faint. I know, I know – totally #1stworldproblems, right?

    So sponge cake is a brilliant cake for lazy bakers because it’s the stand mixer that does the heavy lifting.

    sponge cake with berries

    A word of advice: sift all the dry ingredients. Usually, I ignore these types of instructions but it would be fatal to do so here. If you don’t sift the cream of tartar and bicarbonate of soda you’ll end up with bitter little lumps baked into the cake here and there and it will totally ruin the experience for you. Trust me on this.

    But sifting dry ingredients is a small price to pay for a cake that is otherwise so simple and straightforward.

    sponge cake

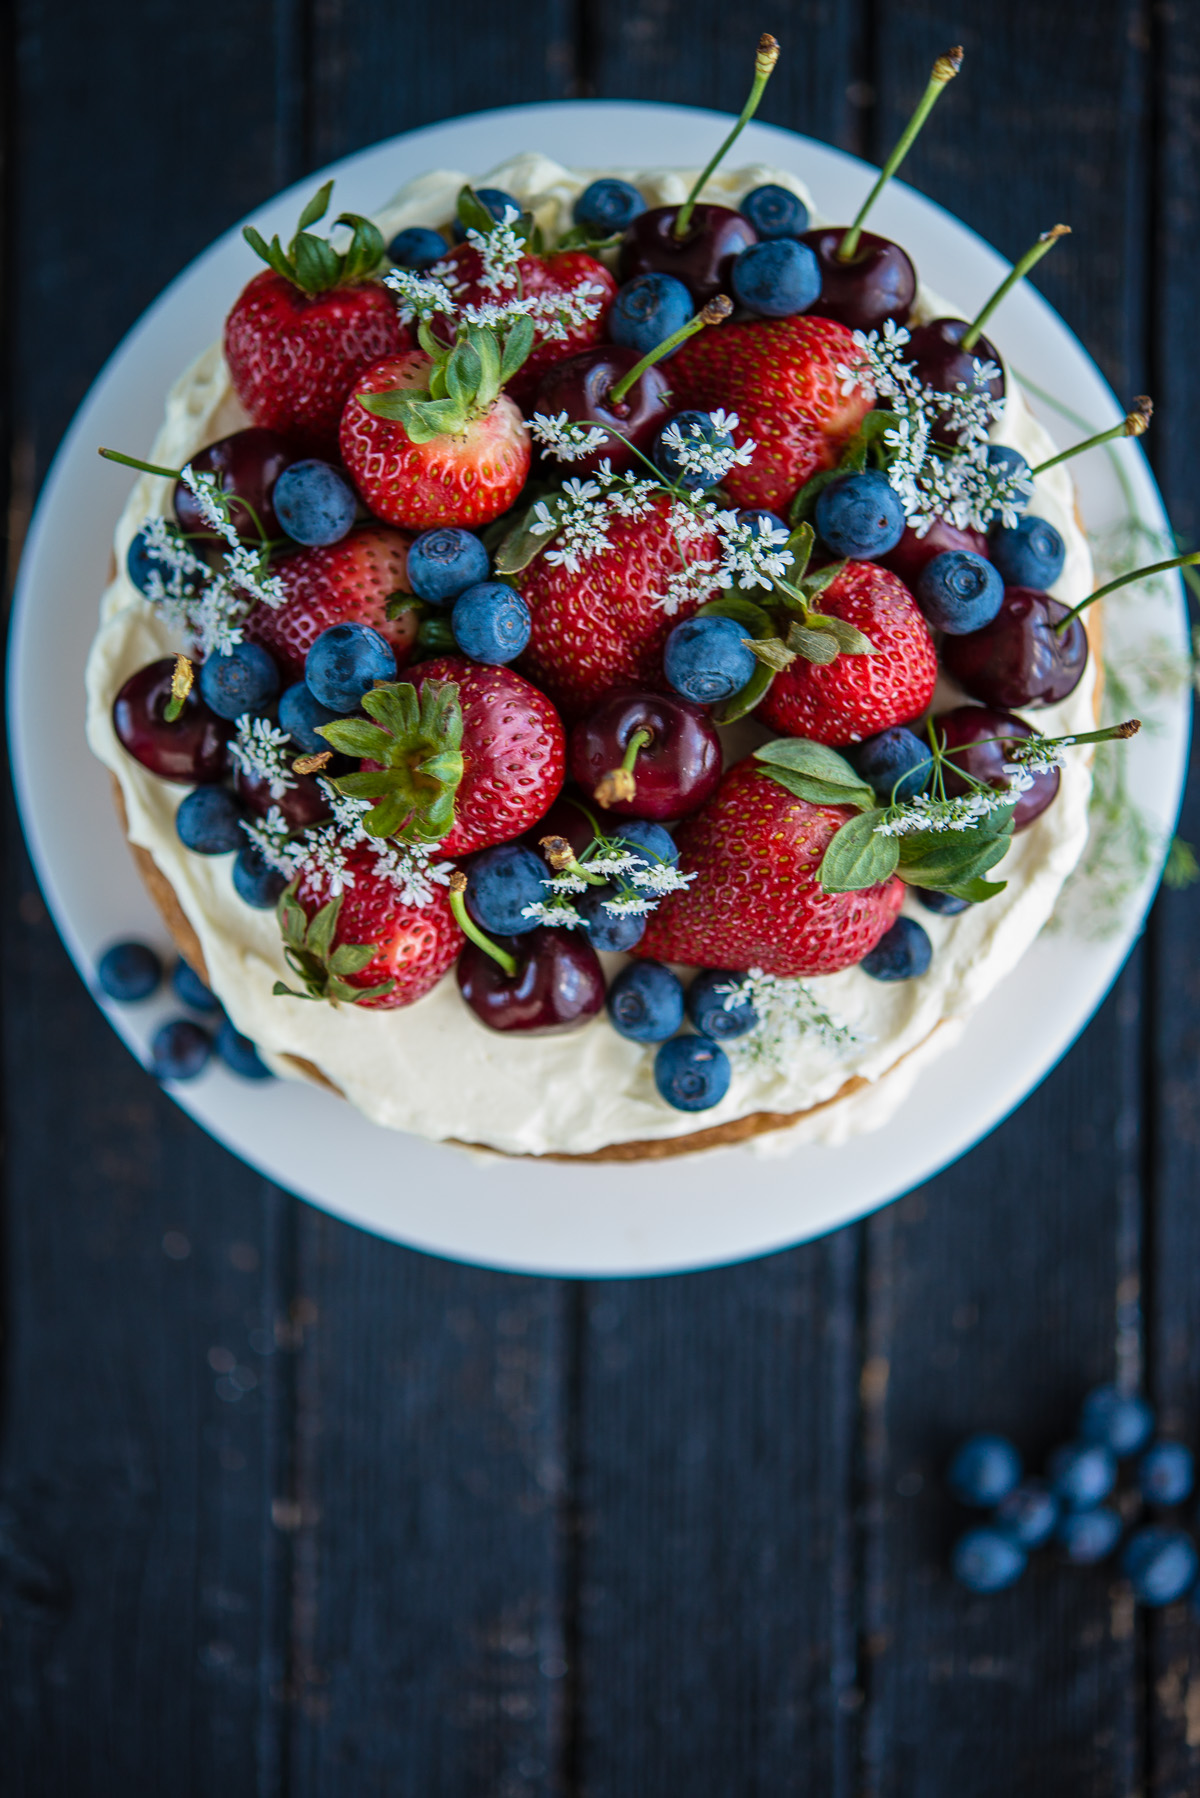
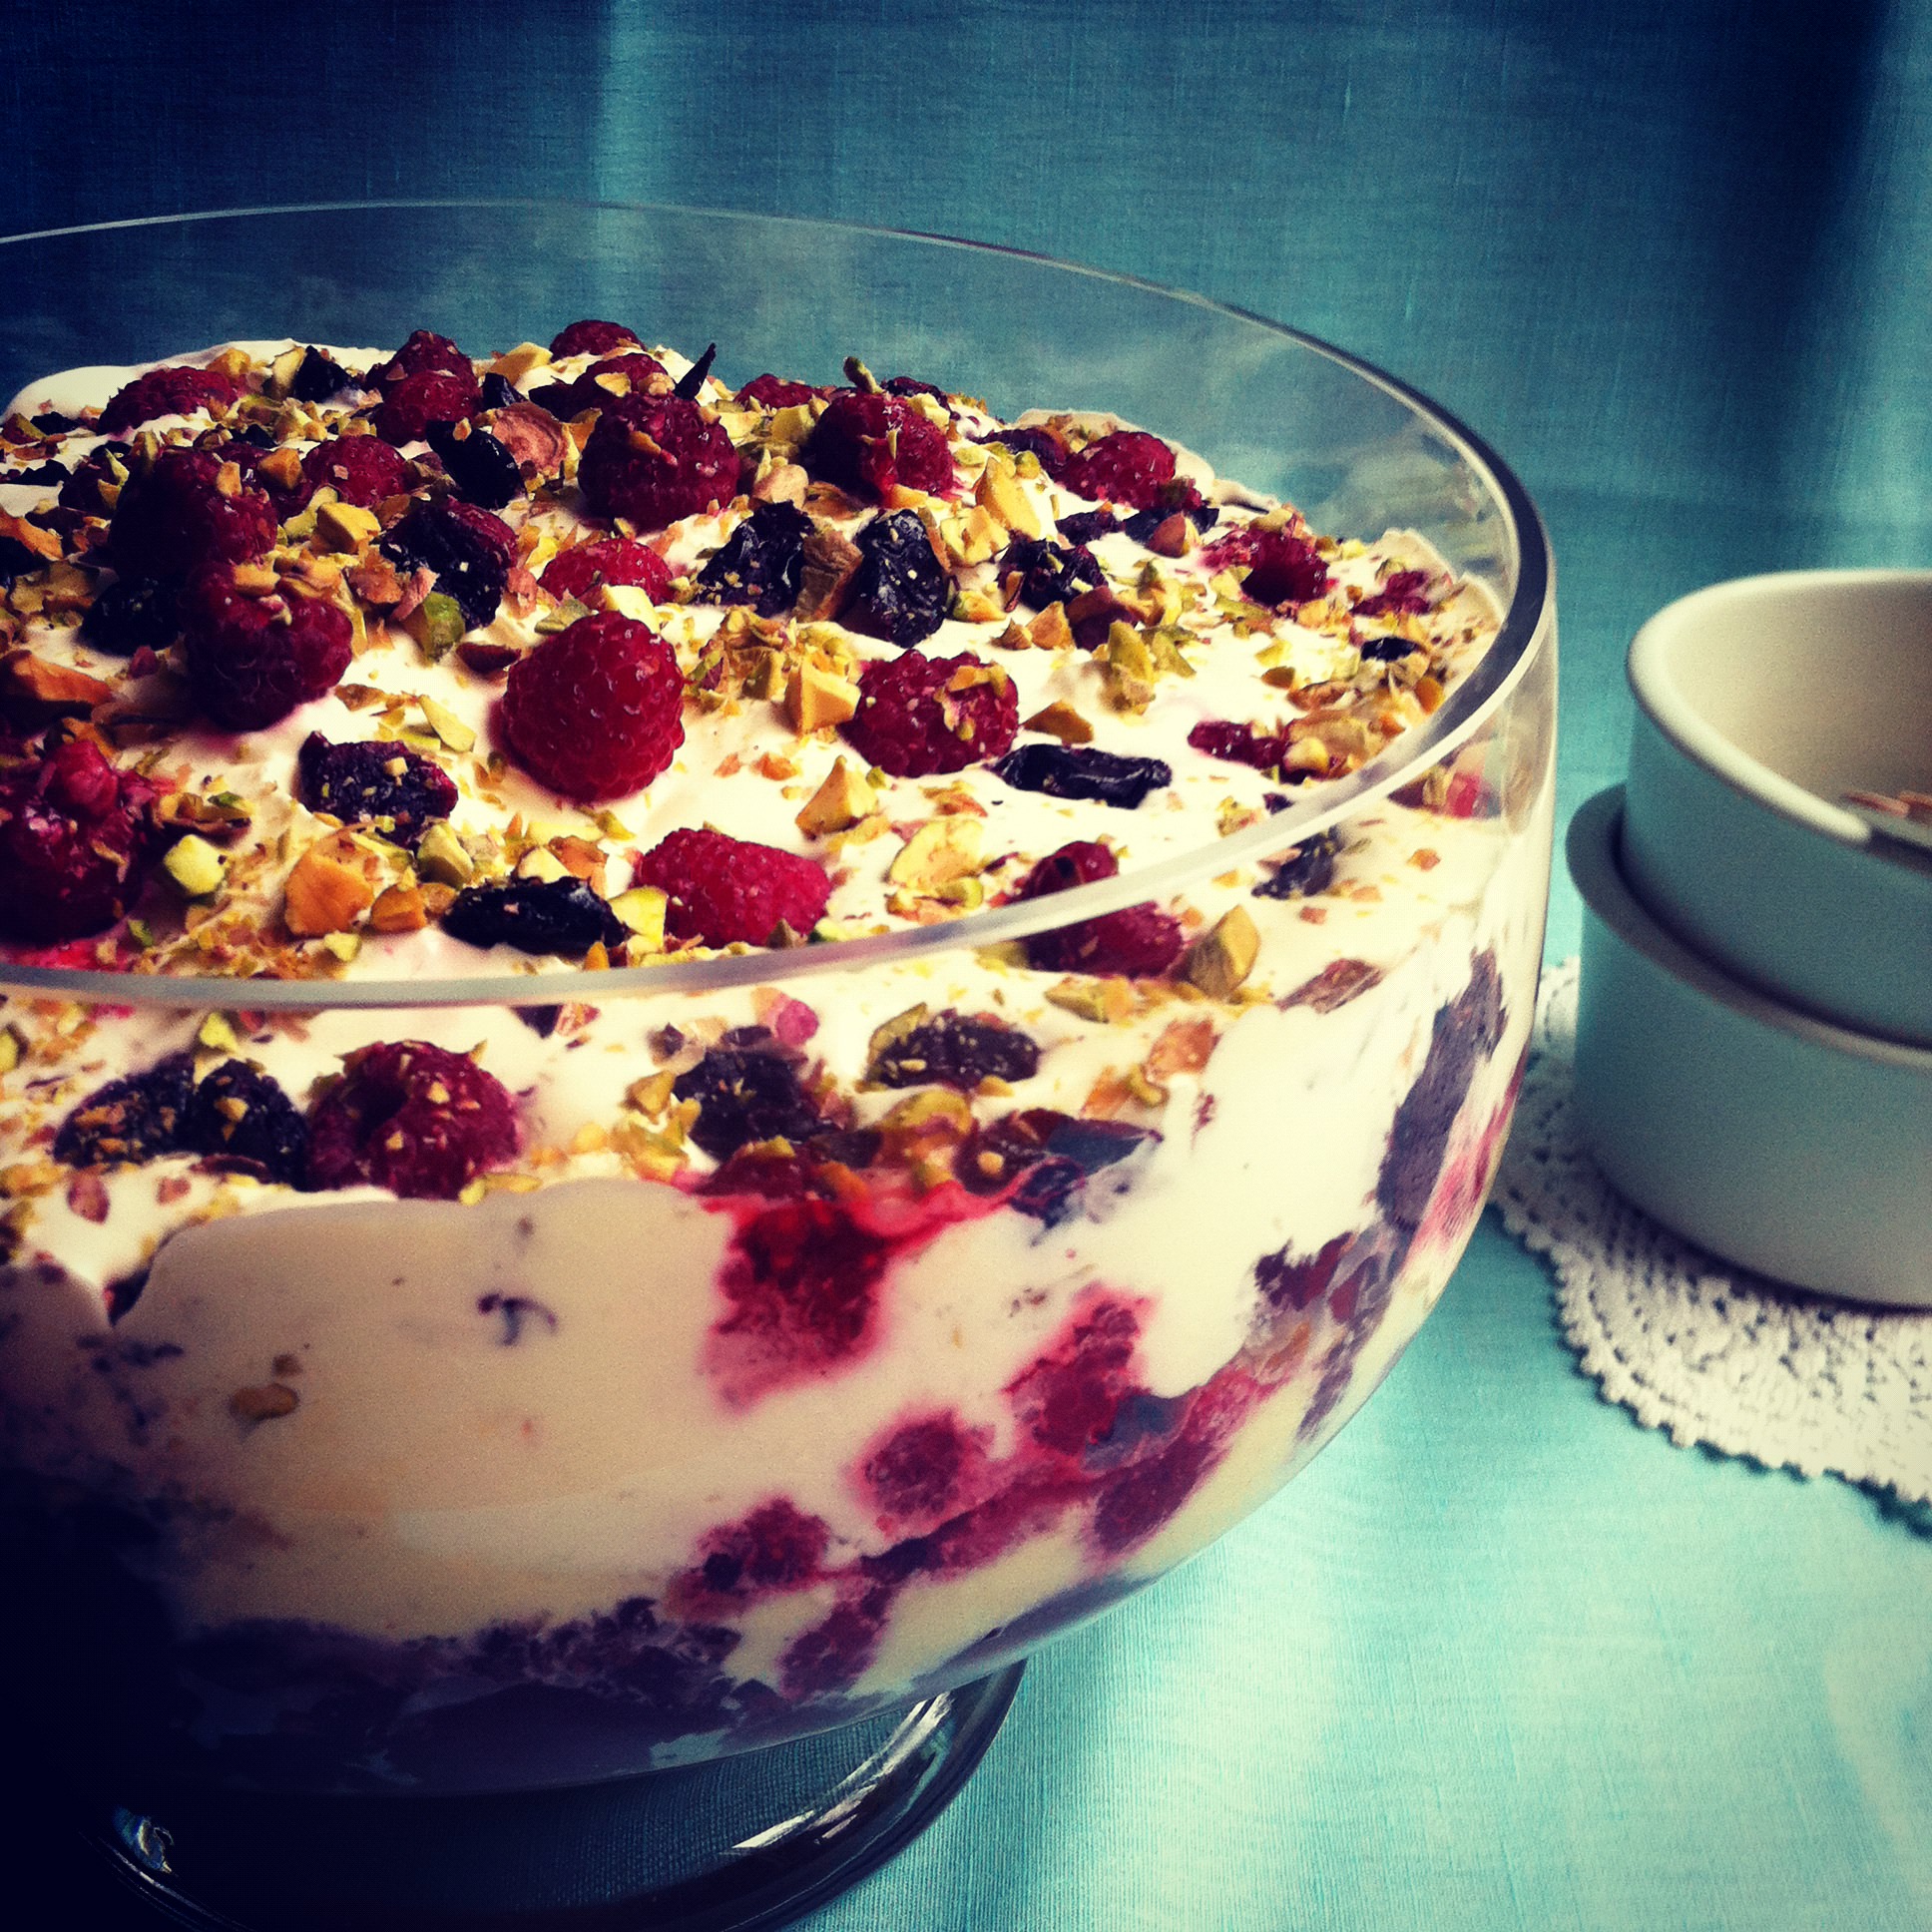
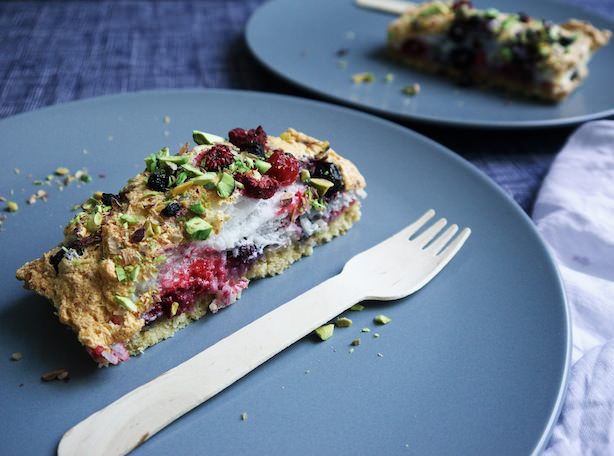
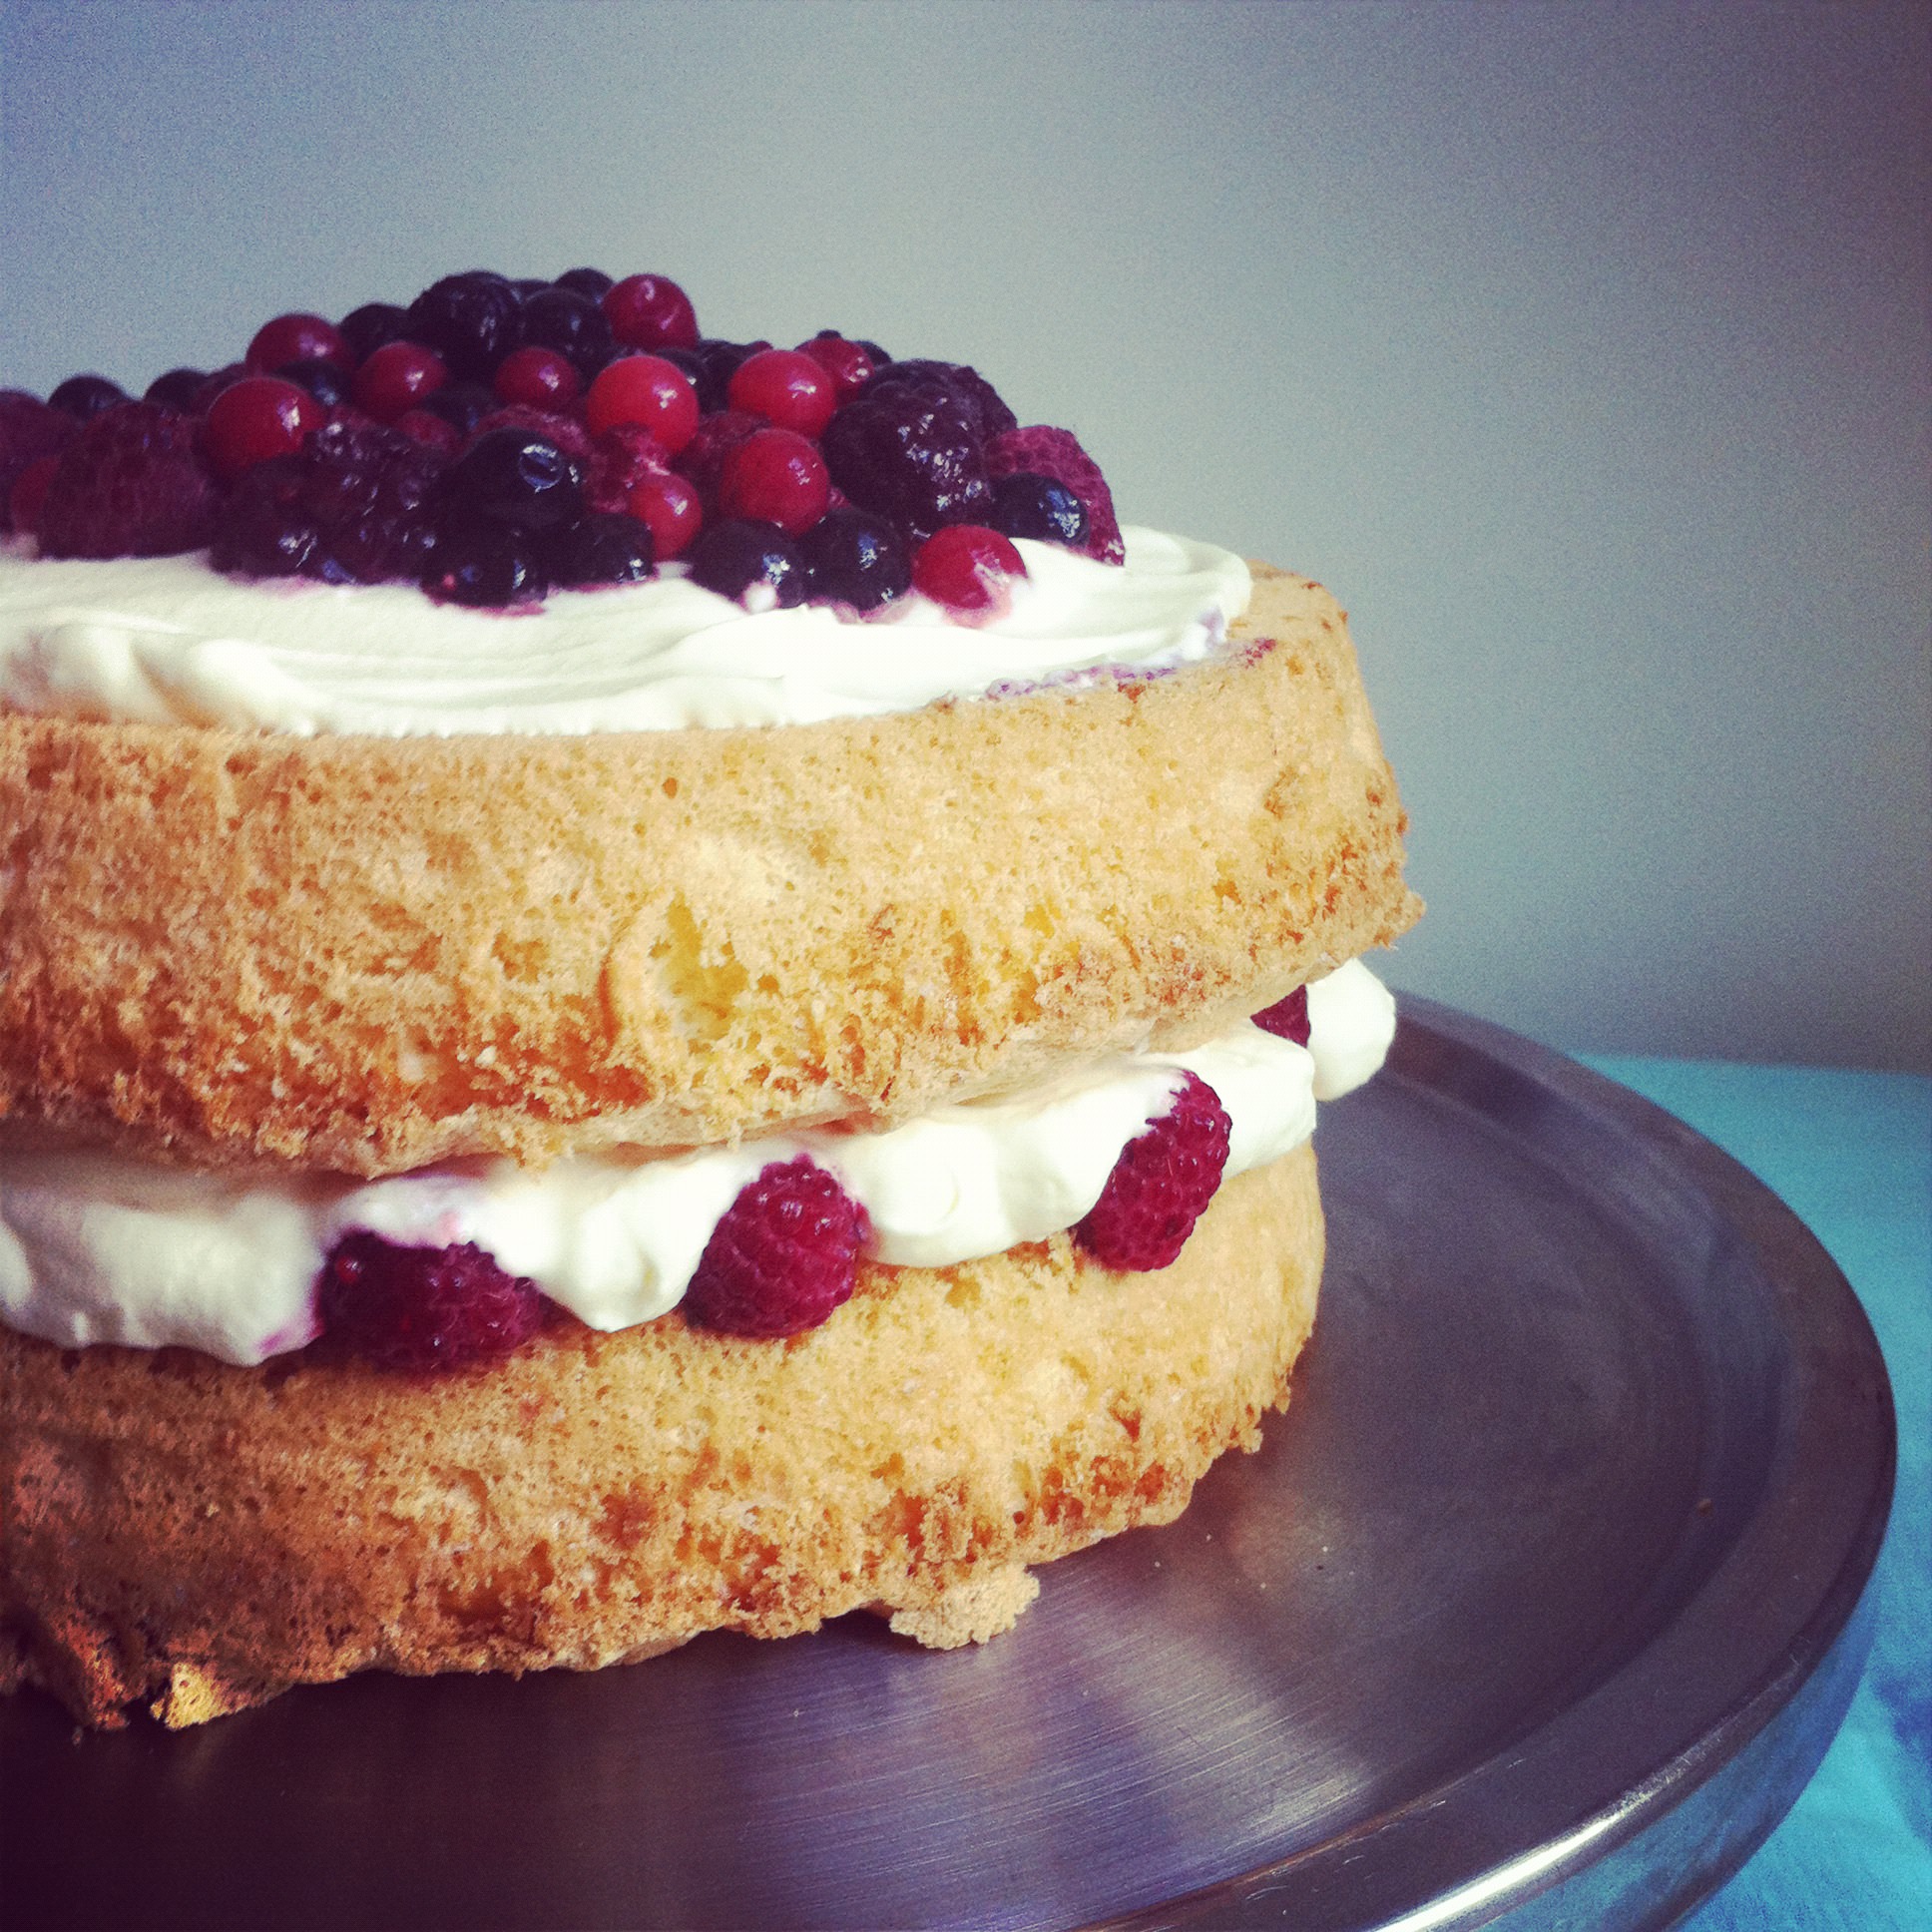
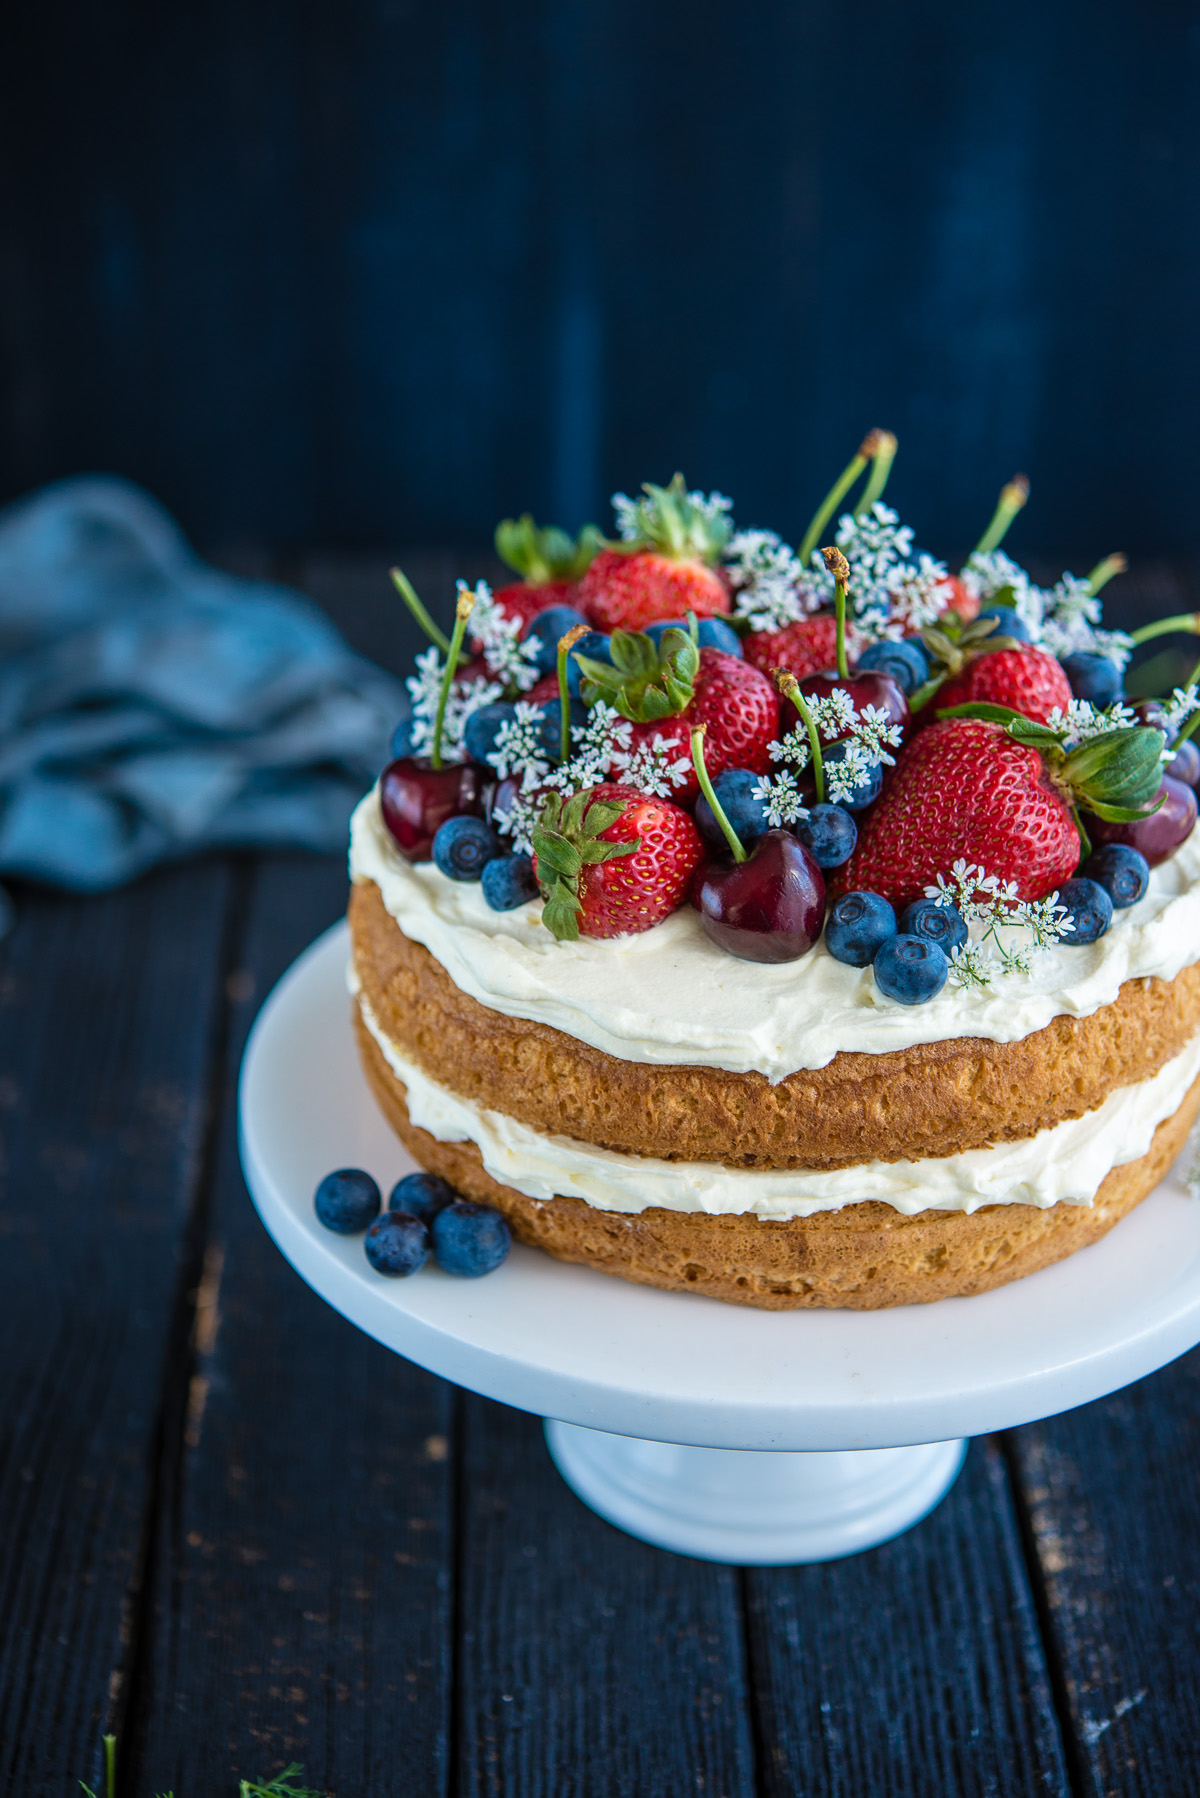
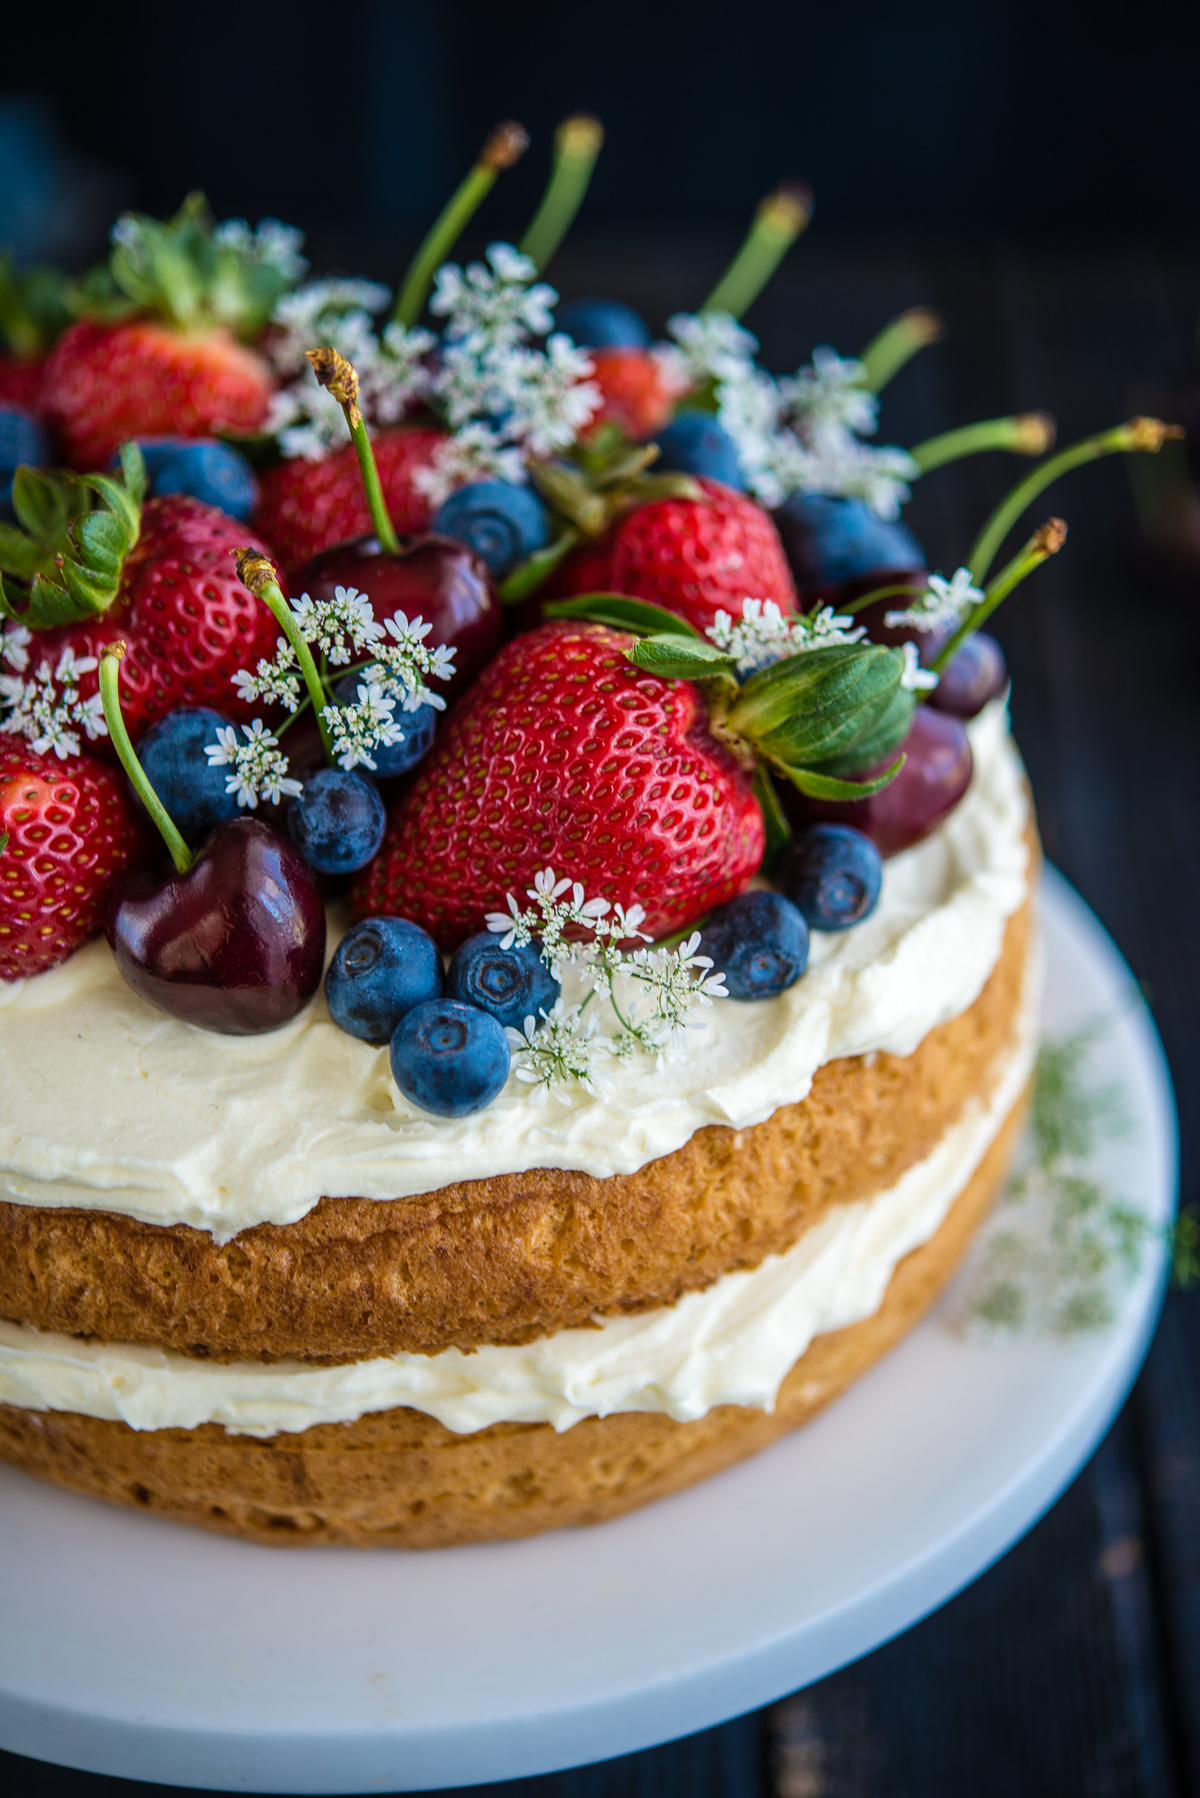
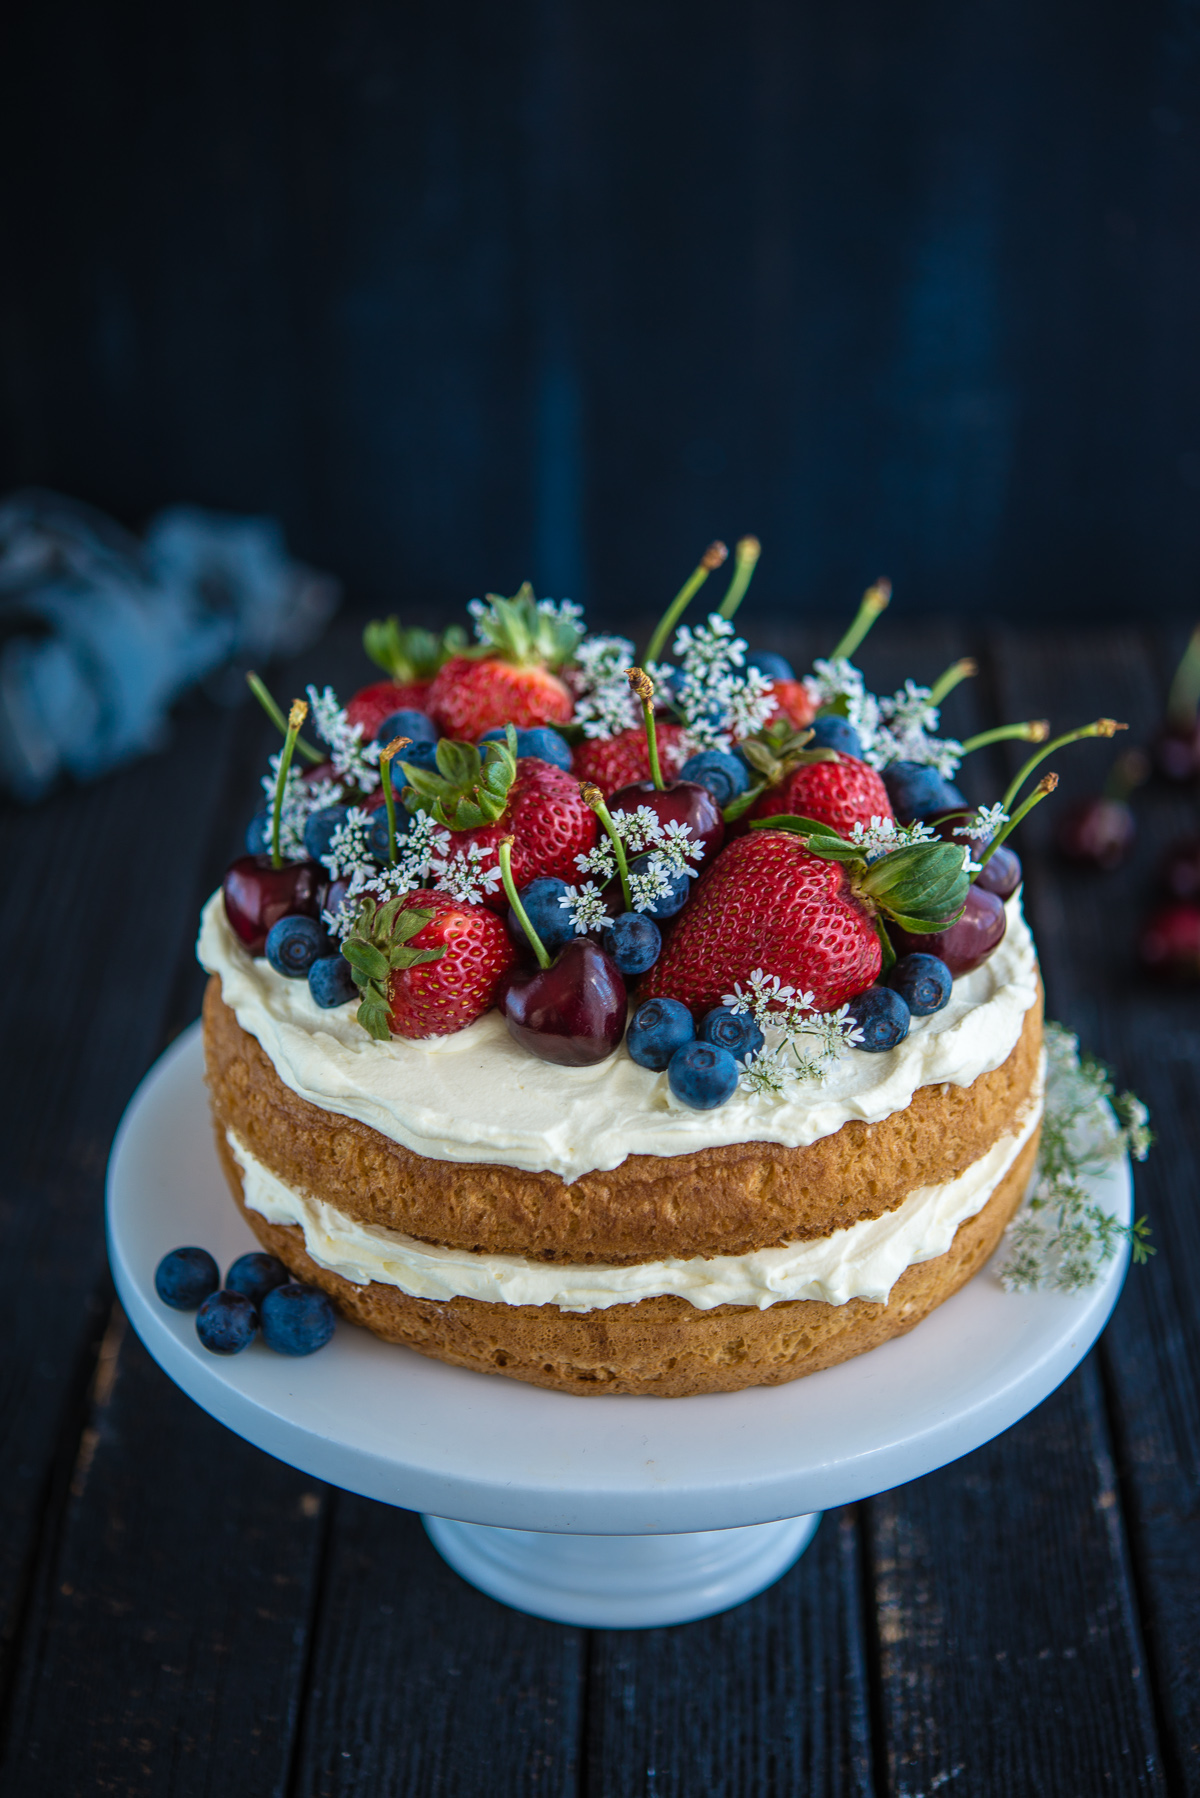
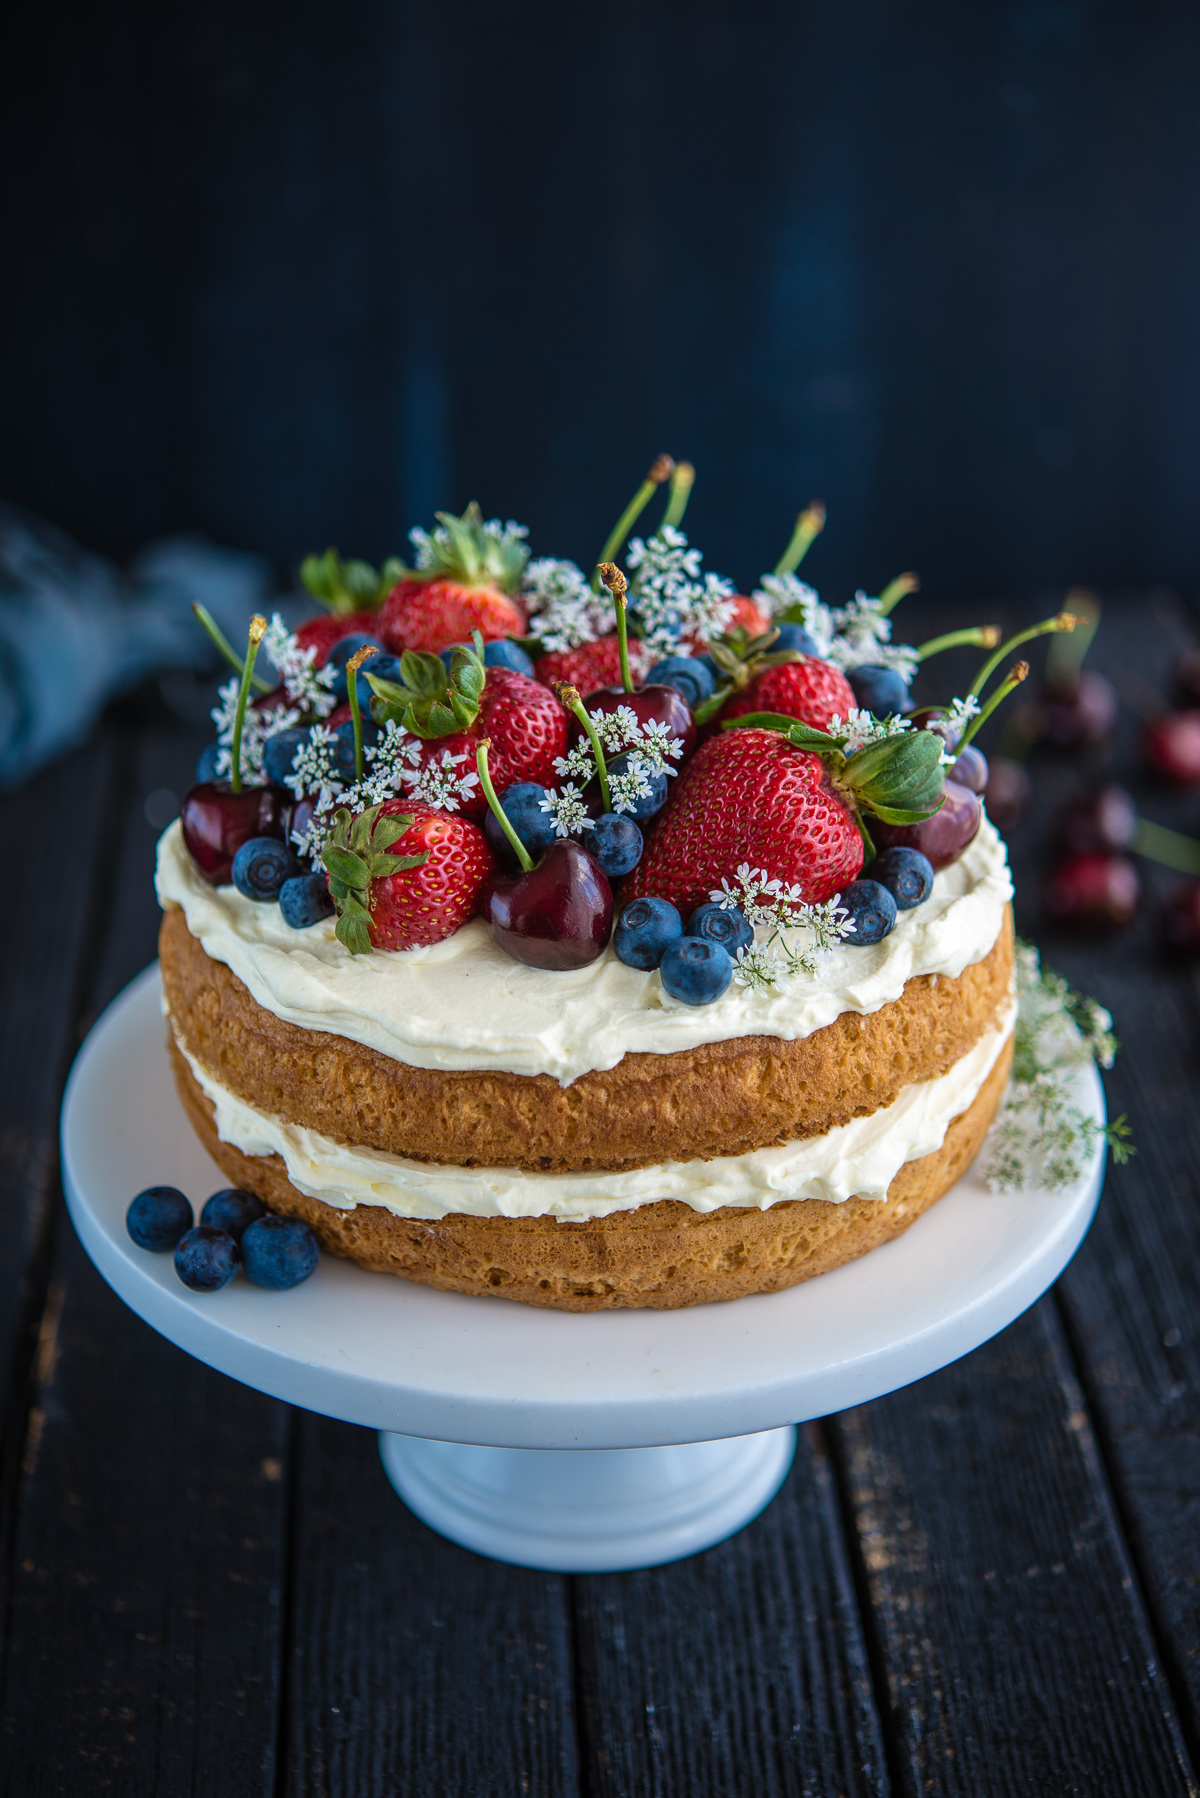
    To decorate this cake I’ve used a mixture of strawberries, dark cherries and blueberries. But use whatever berries you can find – raspberries and blackberries are equally good. The white flowers are from a coriander plant gone to seed at a friend’s house.

    sponge cake

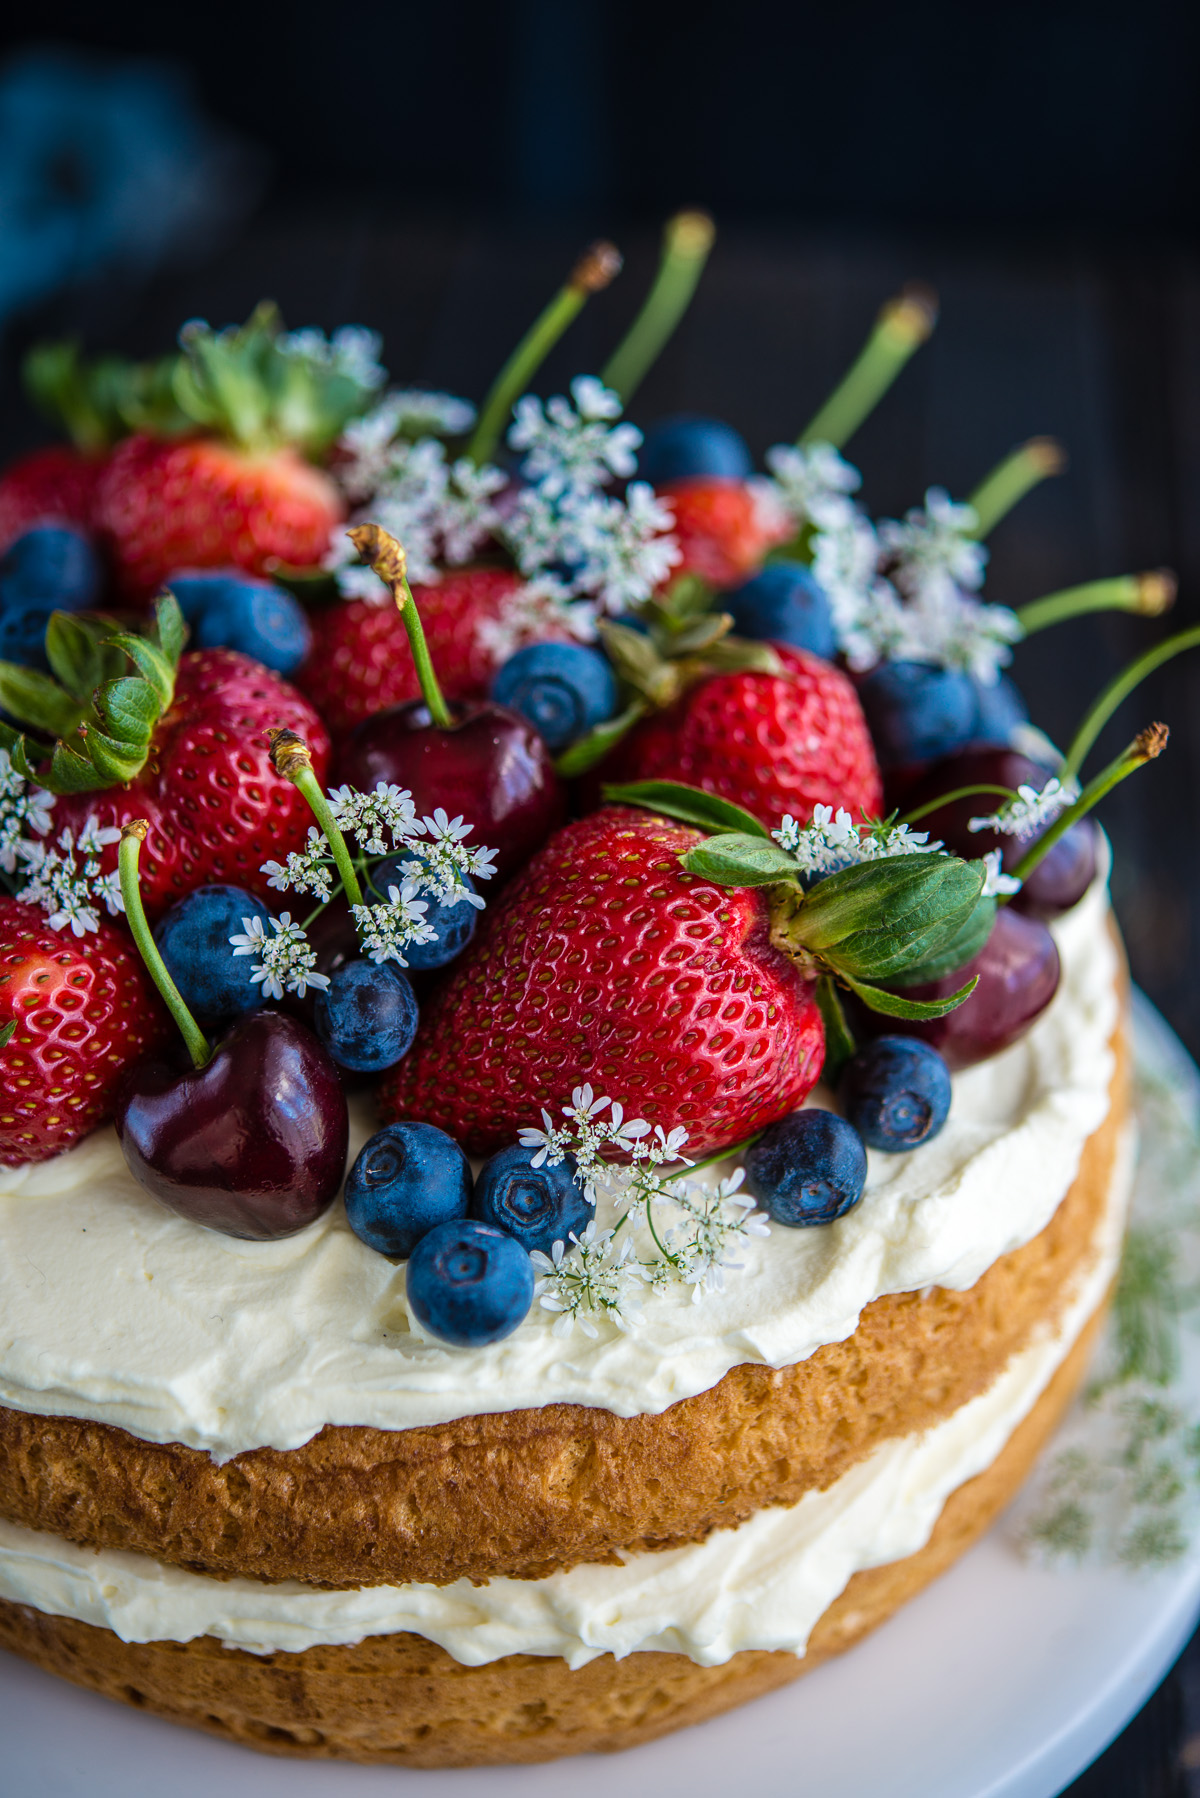
    If you’re taking this cake to a friend’s house, take the baked cakes, a bowl of whipped cream and the berries with you and assemble it on the spot. The beauty of this fruit and flower decoration is that it should look natural and haphazard so you don’t have to worry about things like symmetry and perfect icing. Just start with the largest fruit first and then fill in the spaces with the second largest and so on.

    Too easy, right? Perfect for so many different occasions, too. Just like my blue jeans.

    sponge cake with berries

    Sponge Cake with Berries and Cherries

    This recipe is adapted from the Pinch of Salt Sponge Cake recipe by Margret Green in Liz Harfull’s delightful Blue Ribbon Cookbook about prize-winning country show cooks by Wakefield Press.

    INGREDIENTS

    • 3 large eggs
    • 1/2 cup sugar (caster sugar, regular sugar or raw sugar)
    • 3/4 cup cornflour
    • 1 teaspoon cream of tartar
    • 1/2 teaspoon bicarbonate of soda
    • 1 heaped tablespoon plain flour
    • 500 mls thickened cream
    • 1/3 cup icing (powdered) sugar
    • 1 punnet strawberries
    • 1/2 punnet blueberries
    • 120 grams cherries (2 handfuls)
    • Coriander flowers or other similar flower (optional) to garnish

    METHOD

    1. Preheat oven to 190 degrees Celsius.
    2. Spray two 20cm cake tins with baking spray or grease with butter or margarine.
    3. Beat eggs and sugar for 10 minutes.
    4. Sift cornflour, cream of tartar, bicarbonate of soda and flour into a medium bowl at least once but preferably thrice. The more times you sift the better the rise of the cake will be.
    5. Use the beater(s) to fold the sifted, dry ingredients into the egg and sugar mixture gently, trying to retain as much of the air in the mixture as possible.
    6. Bake for 18-20 minutes. Top should be springy and sides should be coming away with the pan.
    7. Let cakes cool for 10 minutes and then remove cakes from tin and place on a tea towel on the kitchen bench. Cover cakes with the cake tins and leave them to cool completely.
    8. To assemble, whip cream with powdered sugar until desired consistency.
    9. Place one of the cakes  on a serving plate or cake stand. Using a spatula spread half the cream on the cake and use an offset spatula to smooth and tidy up. Place the other cake half on top and repeat.
    10. Decorate with berries and herb flowers or similar (optional).

    NOTES

    • I used 2 x 20cms cake tins. Margret’s original recipe specifies 2 x 18cm cake tins so if you use these your cakes will be higher than mine (and more impressive!). If you do use 2 x 18 cms cake tins, you’ll need to increase the cooking time to 20-25 minutes.
    • If you have a real sweet tooth you could spread a layer of berry jam on top of the bottom cake before adding the cream.
    • This cake is best eaten on the day it’s baked.
    • Serves 8-10.

    More Cake Recipes

    Disclosure

    I was gifted both the KitchenAid mixer and The Blue Ribbon Cookbook in 2012. Also, I ate 3 pieces of this cake yesterday and my blue jeans are now tight.

    Subscribe to The Hungry Australian

    Don’t want to miss a post? Sign up to receive new posts twice a week – it’s FREE.

  • Discovering my Inner Baker (crushing on KitchenAid)

    Bakers are made, not born.

    Don’t believe me?

    A few years ago, my cakes (and my photography) looked like this:

    Emily Birthday Cake

    Notice how this cake is leaning precariously to one side and the very runny icing is pooling in the middle?

    *Cringe*

    At least my daughter looks darling in her cute fairy-outfit-over-pyjamas look. (Wait, did that comment just turn me into a Mommy Blogger? lol)

    The photograph says it all: I used to SUCK as a baker.

    But over the last couple of years my baking has improved a lot. Over the last year it’s improved dramatically.

    Why?

    Mostly, I’ve made more of an effort. I studied cookbooks and food blogs, bought some great kitchen gadgets (a revolving cake stand, an offset spatula, assorted cake pans and cooling racks), and kept the pantry stocked with baking essentials (flour, sugar, butter, eggs, milk, vanilla, coconut, and icing sugar) so I could bake whenever the urge arose.

    But credit must also go to my latest kitchen accessory and my serious new crush, the KitchenAid Artistan Stand Mixer.

    A few months ago, I received an email from the good folk at Filtered Media about KitchenAid. I responded and not long after a red KitchenAid Artistan Stand Mixer arrived at my home for a test drive.

    Now I’d never had a stand mixer before and had always been curious about Kitchenaid’s stand mixers. Yes, the looked gorgeous, and came in variety of fantastic colours but what was the fascination with them all about? Were they really that good? Or was it a case of style over substance?

    Over the next few months I used the KitchenAid Artistan Stand Mixer regularly, up to four times a week. I made cakes, meringues,  pavlovas,  custards, ice creams, biscuits, Swiss meringue buttercream and slices.

    It was a revelation.

    I’m an impatient person so holding a hand mixer for 10 minutes to cream some eggs and sugar together is not my idea of fun. I usually manage around three minutes before getting bored and chucking the mixture in the pan. This might be OK for some cakes but for others it was a disaster.

    So I love being able to pop the ingredients into the mixing bowl and then potter around the kitchen while the KitchenAid Artistan Stand Mixer worked its magic.

    Moreover, the cakes it produces are impressive.

    Check out the height of this meringue on this Quince Meringue Pie.

    I made the exact same cake two days earlier with my hand mixer and it didn’t look anything like that.

    Now have a look at the Dark Chocolate & Strawberry Swiss Meringue Buttercream Cake  I made for my daughter’s sixth birthday party.

    Yes, I know the Strawberry Swiss Meringue Buttercream has separated a little – I was up late prepping and couldn’t be bothered waiting for the butter to chill. Still, it’s not a bad looking cake and it tasted magnificent.

    Perhaps you’re more into trifles?

    This was a berry trifle I made for a commissioned e-book. It was a real hit at a family dinner.

    Speaking of hits, do you like cake pops?

    These were some delightful and not-too-sweet cake pops that I made for my daughter’s party.

    Perhaps you’d prefer something a little healthier?

    That was my Berry Pistachio Tart with a wholemeal base I made for Sweet Adventures’ Nuts about Nuts bloghop.

    Now it’s true that most of these cakes could have been made equally well with a hand mixer, especially for more patient types. But would you have actually baked them or just thought about it and decided it was too hard most of the time?

    But even if you are are a motivated and patient baker, it’s when you’re baking cakes like sponges that the KitchenAid Artistan Stand Mixer really earns its keep.

    Check out this Instagram of a Victoria Sponge with Berries I made for About.com.

    The cake mixture needs to be beaten for a  full 10 minutes: it’s the only way to get that fabulous height.

    I’d never made a Sponge Cake before because I didn’t feel like I had 10 minutes of my life to spare to hold a hand mixer. But now I just chuck all the ingredients into the KitchenAid Artistan Stand Mixer and it does the heavy lifting for me.

    *Sniffs. Wipes tear.*

    I love it and I can’t imagine my life without it now.

    What about you, dear reader? Do you  use a hand mixer or stand mixer? And how does it affect your baking?

    *** Upcoming Giveaway ***

    Do you love KitchenAid, too? Next week I’ll be giving away two packs containing a KitchenAid Artisan 2-slice Toaster plus a KitchenAid Artisan Coffee Maker for Father’s Day! Don’t miss your chance to win this fantastic prize.

    With thanks to Lisa McLean and Sarah Broome at Filtered Media.